There have been numerous techniques to remove the color component of the Moiré pattern and some techniques (though involved) to remove the luminosity component of the Moiré pattern. In this blog and attached screencast I am going to present an approach I have not seen posted before that provides a productive technique for removing the luminosity component of the Moiré pattern in not all yet a large number of these Moiré patterns.
This technique works in a similar fashion to noise canceling headphones. In such headphones, an equal but opposite sound wave is introduced to effectively cancel out the noise. The Moiré pattern is very similar to waves on the ocean and have a similar presentation on the image. It turns out that the peak of these "waves" in each of the color channels occur slightly offset or out of phase with each other. This allows for the opportunity to combine the color channels in such a way to often nullify the Moiré altogether. This more or less complex math is done with a single color adjustment layer to correct the luminosity portion of the Moiré pattern. Trust me, it feels like magic to correct such a troubling image problem by moving just a couple sliders.
The following image was provided by Randy Brogen and was the image with which I developed this technique. Special thanks to Randy for allowing me to share his image on this blog. Here is the before and after images side by side. This Screencast does a step by step correction using this image:

Copyright © 2011 Randy Brogen
Following is the Screencast
A New Way to Remove Moiré (Part 1 of 2) Screencast
A New Way to Remove Moiré from John Wheeler on Vimeo.
Part Two of the Screencast will cover more details on this approach and is coming "soon."
Additional Notes, Tips, and Issues with this new technicque:
- This technique will not work on every luminosity component of a Moiré pattern. This new technique requires that the peak luminosity of the Moiré pattern is physically separated (out of phase) in the color channels. Many sensor based Moiré patterns (but not all) are of this nature
- All editing needs to be done at 100% magnification or higher or false Moiré patterns will appear spoiling any chances for a good correction
- Working with as close to the original files without compression is helpful. Highly compressed JPEG files degrades the color content needed to phase away the Moiré pattern.
- The adjustments of this technique may slightly change the overall image luminosity so an additional Levels or Curves adjustment layer may be needed to tune up the tone.
- When "phasing out" the luminosity component of the Moiré pattern the optimum tuning point may be slightly different for different areas of the subject. When this occurs, each uniuque section of the subject should have its own adjustment layer and mask so each area can be independently optimized.
- The all white layer used to expose the image luminosity can actually be any neutral color solid layer (e.g. black, gray, white)
- The all white layer used to expose the image luminosity is for viewing the luminosity only. Once the luminosity component of the Moiré pattern has been phased away, that layer can be hidden or removed.
Following are three additional examples for correcting Moiré patterns using this new technique.
This next image was provided by Nadine Ohara a Wedding and Event Photographer. Nadine frequents Photo.net Nadine's example required 3 separate zones on the suit for correction.
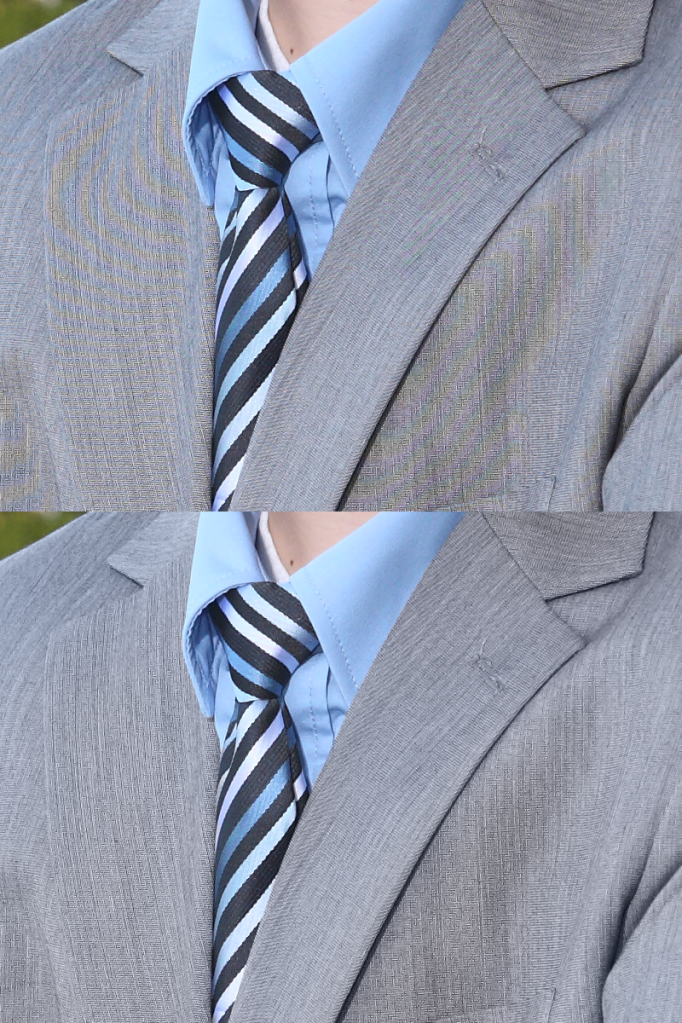
Copyright © 2011 Nadine Ohara
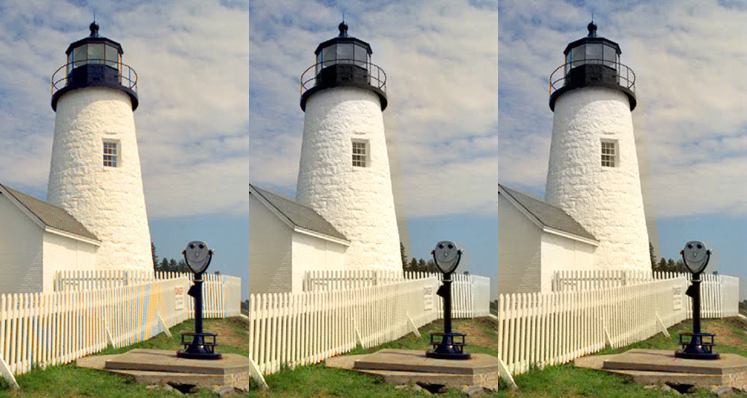
This next image was provide by Gordon Pritchard. His two side by side images show the results from two different de-Mosaicing algoritms used on the raw pixel data from the camera. Details are found on his blog at http://qualityinprint.blogspot.com/2009/12/moire-part-two.html
The Moiré pattern is evident in several portions of this image. The new repair technique in this blog also works on this "non-fabric" subject. It is the fine pattern of the fence that causes the issue.

Focusing just of the fence, the 3 images below show from left to right, the original, corrections to the color component of Moiré, and third adding in the luminosity correction. The color correction by itself looks pretty good, yet also correcting the luminosity component of Moiré reveals more fence detail.


Copyright © 2011 Gordan Pritchard
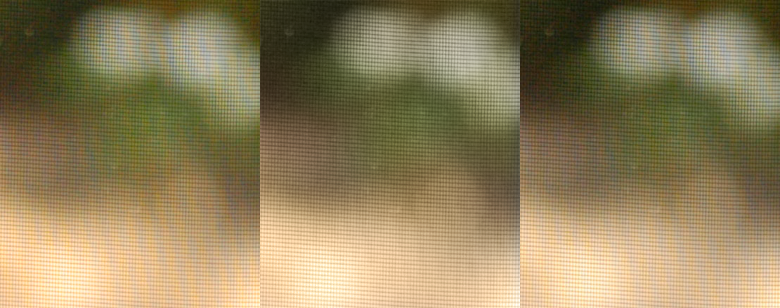
The last image for this blog post comes from Mike Hagen. This is a shot through a screened window. The screen pattern interacts with the camera sensor creating the Moiré pattern. In the original picture, the Moiré pattern was subtle so I increased the image saturation to make it more visible. This also increased the challenge for repair. Again, from left to right, I show the original, corrections to the color component of Moiré, and third adding in the luminosity correction. Image Copyright Mike Hagen - Out There Images, Inc.
The last image for this blog post comes from Mike Hagen. This is a shot through a screened window. The screen pattern interacts with the camera sensor creating the Moiré pattern. In the original picture, the Moiré pattern was subtle so I increased the image saturation to make it more visible. This also increased the challenge for repair. Again, from left to right, I show the original, corrections to the color component of Moiré, and third adding in the luminosity correction.

http://www.outthereimages.com/blog
Twitter @MikeJHagen
Twitter @MikeJHagen
I hope you enjoyed this tutorial on "A New Way to Remove Moiré." All constructive feedback is welcome and positive feedback is enjoyed. Thanks for reading/viewing.
John Wheeler - JKW Consulting LLC


